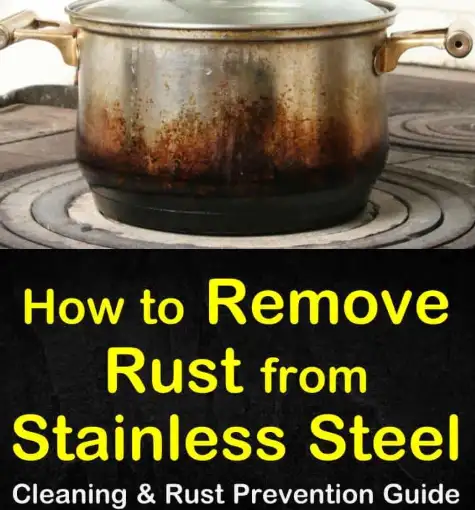
When I first encountered rust stains on my supposedly "stainless" steel appliances, I felt frustrated and confused. After years of working with various metal surfaces and conducting extensive research, I've learned that even stainless steel can develop rust under certain conditions.
Understanding Why Stainless Steel Develops Rust
Stainless steel earns its reputation through a protective chromium oxide layer that forms naturally on its surface. This invisible barrier typically prevents corrosion and maintains the metal's lustrous appearance. However, this protection isn't absolute. When the chromium content falls below 10.5%, or when the protective layer becomes compromised, rust can form.
Several factors contribute to rust formation on stainless steel. Exposure to chlorides, particularly salt water or cleaning products containing chlorine, can break down the protective layer. Scratches and abrasions create vulnerable spots where moisture can penetrate. Poor-quality stainless steel with insufficient chromium content proves more susceptible to corrosion. Additionally, prolonged exposure to moisture without proper drying creates ideal conditions for rust development.
The chemistry behind rust formation involves iron oxidation. When iron atoms lose electrons in the presence of oxygen and moisture, they form iron oxide – the reddish-brown substance we recognize as rust. Even high-quality stainless steel contains iron, making it potentially vulnerable under the right conditions.
Types of Rust and Staining on Stainless Steel
Not all discoloration on stainless steel represents true rust. Understanding the different types helps determine the appropriate removal method. Surface rust appears as light brown or orange spots that haven't penetrated deeply into the metal. This type responds well to gentle cleaning methods and represents the easiest form to remove.
Pitting corrosion creates small holes or depressions in the surface, often accompanied by rust stains. This more serious form requires aggressive treatment and may leave permanent marks even after rust removal. Crevice corrosion occurs in tight spaces where moisture accumulates, such as around bolts, welds, or overlapping surfaces.
Heat tint presents as blue, purple, or brown discoloration caused by high-temperature exposure during welding or manufacturing. While not technically rust, it requires similar removal techniques. Water spots and mineral deposits can also mimic rust stains, appearing as white or brown marks from hard water or cleaning product residue.
Essential Tools and Materials for Rust Removal
Successful rust removal requires the right tools and materials. I've found that having a complete toolkit makes the process more efficient and effective. Basic cleaning supplies include microfiber cloths, soft-bristled brushes, and non-abrasive sponges. Avoid steel wool or abrasive pads that can scratch the surface and create new corrosion sites.
Chemical rust removers vary in strength and application. Mild acids like white vinegar and lemon juice work well for light rust stains. Commercial rust removers containing oxalic acid or phosphoric acid tackle more stubborn deposits. Always choose products specifically designed for stainless steel to avoid damaging the surface.
Protective equipment ensures safety during the cleaning process. Rubber gloves protect your hands from chemicals and prevent skin oils from transferring to the cleaned surface. Safety glasses shield your eyes from splashing chemicals or debris. Work in well-ventilated areas when using chemical products to avoid inhaling fumes.
Specialized tools enhance your rust removal capabilities. Plastic scrapers remove heavy deposits without scratching. Fine-grit sandpaper (400-600 grit) works for stubborn spots but requires careful technique. Rotary tools with polishing attachments speed up the process for large areas but demand experience to avoid damage.
Step-by-Step Rust Removal Methods
Method 1: Natural Acid Treatment
I often start with natural acids for light rust stains, as they're gentler on the stainless steel surface. Create a paste using baking soda and water, then apply it to the rusted area. Let it sit for 30 minutes before scrubbing gently with a soft brush. The mild abrasive action combined with the alkaline properties helps lift surface rust.
For more stubborn stains, white vinegar provides stronger acid action. Soak a cloth in undiluted white vinegar and place it over the rust stain. Allow it to sit for several hours or overnight, then scrub gently and rinse thoroughly. The acetic acid in vinegar dissolves rust while being relatively safe for stainless steel.
Lemon juice offers another natural alternative with citric acid providing the cleaning power. Cut a fresh lemon in half and rub it directly on the rust stain, or create a paste with lemon juice and salt. The salt acts as a mild abrasive while the acid dissolves the rust. Always rinse thoroughly after treatment to prevent acid damage.
Method 2: Commercial Rust Removers
When natural methods fall short, commercial rust removers provide stronger cleaning power. Choose products specifically formulated for stainless steel to ensure compatibility. Apply the product according to manufacturer instructions, typically involving a waiting period for the chemicals to work.
Oxalic acid-based removers effectively dissolve rust without damaging the underlying metal. Apply with a brush or cloth, allow the recommended contact time, then scrub gently and rinse thoroughly. These products often require multiple applications for heavy rust deposits.
Phosphoric acid products not only remove rust but also create a protective phosphate coating that helps prevent future corrosion. However, they may leave a slightly different surface texture, so test in an inconspicuous area first.
Method 3: Mechanical Removal
For heavy rust deposits that resist chemical treatment, mechanical removal becomes necessary. Start with the gentlest method possible to avoid unnecessary surface damage. Fine steel wool (0000 grade) can remove stubborn rust while minimizing scratches, but use it cautiously and always follow the grain direction.
Sandpaper works for severely rusted areas but requires careful technique. Use progressively finer grits, starting with 220 grit for heavy rust and finishing with 400-600 grit for smoothing. Always sand in the direction of the existing grain pattern to maintain the surface appearance.
Rotary tools with abrasive discs speed up the process for large areas but demand experience and steady hands. Start with lower speeds and light pressure, increasing gradually as needed. Follow up with polishing compounds to restore the surface finish.
Comparison of Rust Removal Methods
| Method | Effectiveness | Time Required | Surface Damage Risk | Cost | Best For |
|---|---|---|---|---|---|
| White Vinegar | Moderate | 2-12 hours | Very Low | Very Low | Light surface rust |
| Lemon Juice + Salt | Moderate | 1-4 hours | Low | Very Low | Light to moderate rust |
| Baking Soda Paste | Low-Moderate | 30 minutes-2 hours | Very Low | Very Low | Fresh rust stains |
| Commercial Rust Remover | High | 15 minutes-2 hours | Low-Moderate | Moderate | Stubborn rust deposits |
| Fine Steel Wool | High | 15-60 minutes | Moderate | Low | Heavy rust buildup |
| Sandpaper | Very High | 30-120 minutes | High | Low | Severe corrosion |
| Rotary Tool | Very High | 15-45 minutes | High | High | Large areas, professional use |
Case Study: Restoring a Rusted Stainless Steel Grill
Last summer, I encountered a severely rusted stainless steel grill that had been neglected for several seasons. The owner had stored it outdoors without proper protection, and salt spray from nearby ocean air had accelerated the corrosion process. Rust stains covered approximately 60% of the surface, with some areas showing pitting corrosion.
The restoration process began with assessment and photography to document the initial condition. I started with the gentlest method – a white vinegar soak – applying soaked cloths to the affected areas and allowing them to work for 12 hours. This removed about 30% of the surface rust and revealed the extent of deeper corrosion.
For the remaining rust, I escalated to a commercial oxalic acid-based rust remover. After three applications with 30-minute contact times, most of the rust dissolved. The pitted areas required mechanical treatment using 400-grit sandpaper followed by 600-grit for smoothing. I worked carefully in the direction of the grain to maintain the surface appearance.
The final step involved polishing with a commercial stainless steel polish to restore the protective layer and shine. The entire process took approximately 8 hours spread over two days, but the results were remarkable. The grill looked nearly new, with only minor evidence of the previous corrosion in the form of slightly roughened areas where pitting had occurred.
This case demonstrated the importance of using multiple methods in sequence, starting with the gentlest approach and escalating as needed. It also highlighted the value of patience – rushing the process often leads to surface damage that's difficult to repair.
Prevention Strategies and Maintenance
Preventing rust formation proves far easier than removing it after it develops. Regular cleaning removes contaminants that can compromise the protective chromium oxide layer. I recommend cleaning stainless steel surfaces at least weekly in normal conditions, or daily in high-corrosion environments like coastal areas or industrial settings.
Proper drying after cleaning prevents moisture accumulation that facilitates rust formation. Use clean, dry cloths to remove all water spots and residue. Pay special attention to crevices, joints, and areas where water might pool. In humid environments, consider using fans or dehumidifiers to speed the drying process.
Protective coatings provide an additional barrier against corrosion. Commercial stainless steel polishes contain protective agents that help maintain the surface integrity. Apply these products according to manufacturer instructions, typically every few months or as needed based on environmental conditions.
Environmental control plays a crucial role in rust prevention. Minimize exposure to chlorides by avoiding salt-based cleaning products and protecting surfaces from salt spray. Control humidity levels when possible, and ensure adequate ventilation to prevent moisture accumulation. Store stainless steel items in dry locations when not in use.
Professional vs. DIY Approaches
Many rust removal tasks can be accomplished by homeowners with proper knowledge and tools. Simple surface rust on appliances, fixtures, and small items typically responds well to DIY treatment. The methods I've outlined work effectively for most residential applications and can save considerable money compared to professional services.
However, certain situations warrant professional intervention. Valuable or irreplaceable items merit professional attention to minimize the risk of damage. Complex geometries, such as intricate architectural elements or precision equipment, require specialized knowledge and tools. Extensive rust damage or pitting corrosion may need professional assessment to determine if restoration is worthwhile.
Safety considerations also influence the decision. Large items requiring extended chemical treatment or mechanical removal may pose risks that professionals can better manage. Commercial or industrial applications often involve regulatory compliance issues that require professional expertise.
When choosing professional services, look for experience with stainless steel restoration, proper insurance coverage, and references from similar projects. Get detailed estimates that specify the methods to be used and expected results. Remember that some damage may be irreversible, and professionals should honestly assess the feasibility of restoration.
Advanced Techniques and Troubleshooting
Sometimes standard methods don't achieve desired results, requiring advanced techniques or troubleshooting approaches. Electrolytic rust removal uses electrical current to reverse the oxidation process, effectively "un-rusting" the metal. This method requires specialized equipment and knowledge but can achieve excellent results on severely corroded items.
Ultrasonic cleaning employs high-frequency sound waves to create cavitation bubbles that remove contaminants from surface irregularities. While primarily used for small items, this technique can remove rust from areas that resist other methods. The process requires specialized equipment but produces excellent results without surface damage.
Heat treatment can sometimes help with stubborn rust stains, particularly heat tint. Controlled heating and cooling cycles can alter the surface chemistry and make rust more susceptible to removal. This technique requires expertise to avoid damaging the stainless steel properties.
When standard methods fail, the problem might not be rust at all. Discoloration from cleaning products, mineral deposits, or manufacturing residues can mimic rust stains. Try different removal methods or consult with materials experts to identify the actual cause of the discoloration.
Environmental and Safety Considerations
Rust removal often involves chemicals that require proper handling and disposal. Read all safety data sheets and follow manufacturer guidelines for personal protection. Work in well-ventilated areas to avoid inhaling fumes, and keep chemical products away from children and pets.
Disposal of used chemicals and contaminated materials must follow local regulations. Many communities have hazardous waste collection programs for household chemicals. Never pour chemical rust removers down drains or into storm sewers, as they can harm aquatic life and contaminate water supplies.
Environmental alternatives offer safer options for many applications. The natural acids I mentioned earlier break down into harmless compounds and pose minimal environmental risk. Mechanical removal methods produce only metal particles and dust, which can be collected and disposed of as regular waste.
Consider the lifecycle impact of your rust removal choices. While stronger chemicals might work faster, they often require more protective equipment and careful disposal. Natural methods might take longer but reduce environmental impact and health risks.
Economic Aspects of Rust Removal
The cost of rust removal varies widely based on the method chosen and the extent of damage. DIY approaches using natural products typically cost under $20 for supplies, while commercial rust removers might cost $50-100 for a complete treatment. Professional services can range from $100-500 for small items to thousands for large restoration projects.
Prevention costs significantly less than removal. Regular maintenance supplies – cleaning products, protective coatings, and tools – typically cost $50-100 annually for a household. This investment prevents rust formation and extends the life of stainless steel items, providing excellent return on investment.
Factor in the value of your time when comparing DIY versus professional approaches. Simple rust removal might take 2-4 hours of your time, while complex restoration projects could require 10-20 hours or more. Professional services might cost more upfront but save considerable time and effort.
Consider the replacement cost of severely corroded items. A rusted stainless steel appliance might cost $500-2000 to replace, making even expensive professional restoration economically justified. However, some items with extensive damage might be beyond economic repair.
Frequently Asked Questions
Q: Can rust on stainless steel spread to other areas?
A: Yes, rust can spread on stainless steel through several mechanisms. Rust particles can transfer to clean areas through contact or water flow, creating new corrosion sites. More importantly, the conditions that caused the initial rust – such as chloride exposure or surface damage – often affect larger areas. The rust itself can also create an acidic environment that accelerates further corrosion. This is why prompt treatment is essential when rust appears.
Q: Is it safe to use bleach on stainless steel to remove rust?
A: No, bleach should never be used on stainless steel. Bleach contains chlorine compounds that can severely damage the protective chromium oxide layer, making the steel more susceptible to corrosion. Even diluted bleach solutions can cause pitting and discoloration. Instead, use products specifically designed for stainless steel or the natural acids I mentioned earlier. If you accidentally use bleach, rinse immediately with plenty of water and apply a stainless steel cleaner to help restore the protective layer.
Q: How can I tell if the discoloration is actually rust or something else?
A: True rust has a characteristic reddish-brown color and often appears as spots or streaks. It typically feels rough to the touch and may flake off with gentle scraping. Water spots from hard water appear white or grayish and feel smooth or slightly chalky. Heat tint from welding or high temperatures creates blue, purple, or brown rainbow-like patterns. Food stains tend to be darker and may have specific colors related to the food source. If you're unsure, try a mild cleaning method first – true rust will require more aggressive treatment than other types of stains.
Q: Will removing rust damage the stainless steel finish?
A: Proper rust removal techniques should not damage the stainless steel finish significantly. However, aggressive methods like coarse abrasives or strong acids can cause surface scratches or alter the appearance. Always start with the gentlest method that will be effective, and test in an inconspicuous area first. When using mechanical methods, work in the direction of the existing grain pattern to maintain uniformity. Some very light surface texturing is normal after rust removal, and this can often be minimized with proper polishing techniques.
Q: How long does it take for rust to form on stainless steel?
A: Rust formation time depends on several factors including the grade of stainless steel, environmental conditions, and surface condition. In harsh environments with salt exposure and high humidity, rust can begin forming within days on damaged or low-quality stainless steel. Under normal indoor conditions with proper maintenance, high-quality stainless steel can remain rust-free for decades. However, once the protective layer is compromised through scratches, chemical exposure, or contamination, rust can develop relatively quickly – often within weeks or months depending on conditions.
Conclusion
Removing rust from stainless steel requires understanding the underlying causes, choosing appropriate methods, and implementing proper prevention strategies. Through my experience with various rust removal projects, I've learned that patience and proper technique yield the best results. Starting with gentle methods and escalating as needed protects the surface while achieving effective rust removal.
Prevention remains the most cost-effective approach to maintaining stainless steel surfaces. Regular cleaning, proper drying, and protective treatments prevent most rust formation and extend the life of your stainless steel items. When rust does occur, prompt treatment prevents it from spreading and becoming more difficult to remove.
The methods and techniques I've shared represent proven approaches based on both scientific principles and practical experience. Whether you choose DIY methods or professional services depends on your comfort level, available time, and the value of the items being treated. With proper knowledge and tools, most rust removal tasks can be accomplished successfully, restoring your stainless steel surfaces to their original condition.
Remember that some rust damage may be irreversible, particularly deep pitting or extensive corrosion. In these cases, focus on preventing further damage and consider whether restoration is economically justified compared to replacement. The key is early detection and prompt treatment to maintain the beauty and functionality of your stainless steel surfaces.


